| |
|
| |
 |
| |
If you have questions or an idea you'd like to see demonstrated here, please send your comments to: RWmailbag@zacks.com |
| |
As a Research Wizard user, you already know what a powerful program it is. It's also amazingly versatile, and the more you use the program, the more new things you'll discover. What's great about Research Wizard users is they come from all walks of life, with varying trading backgrounds, skill sets, and goals.
Moreover, the range of users includes individual investors to professional traders; those brand new to the Research Wizard to those with 10 years or more experience with the program; some with their first ten thousand dollars to invest to others managing hundreds of thousands to millions of dollars.
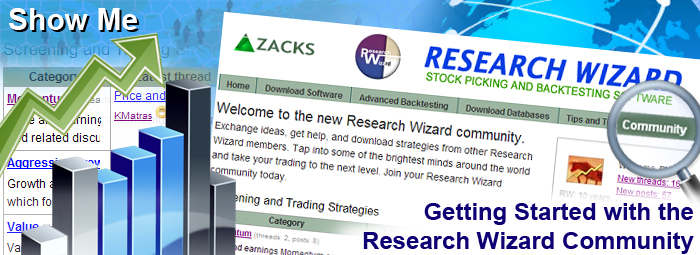
Because of this, we wanted to create a community where all users of the Research Wizard could interact with each other, exchange ideas, get help on the program, download strategies from other Research Wizard members, and tap into the brightest minds from all around the world.
And we're excited to present our new Research Wizard Community (RWC). This community is different than most communities. Not only is it a place to keep up on everything Research Wizard related, but you can include images with your posts, upload and download trading strategies, be alerted to when new posts or threads are available from your favorite fellow members, and see who other member's favorites are to see if you'd like to follow them as well. Additionally, each member has their own blog, so they can quickly share their most important thoughts, comments, and etc., and users can quickly access this rich catalogue of information quickly and easily, in one simple place.
Please read on below to see how easy it is to get started and to learn about all of the great new features the community has to offer so you can take your Research Wizard experience and trading to the next level.
Registering for the First Time and Logging In
If you're already registered, just go to the Welcome! box in the upper right of the Community page (http://community.zacksrw.com) and simply plug in your RW Community Username and Password that you created, and you'll be greeted by your chosen screen name along with alerts of new posts and threads.
To register for the first time, just go to that same Welcome! box in the upper right corner and click the link that reads: "Not registered yet? Click to create an account."
Once you do, you'll be taken to a page where you will first plug in your RW Username and Password to begin the registration process. (See below.) The Research Wizard Community is only for RW users, so only those with a valid RW Username and Password can register.
While you can browse the comments and posts without being a user, you cannot write posts of your own or download user strategies unless you're a member. (If you don't know your Username and Password, you can retrieve it by opening up the Research Wizard program, and clicking on 'Tools' (on the Menu Bar), and then 'Change Password', and you'll see it stored in that window.)
Once you fill that box out, you'll be taken to a page where you can create a Community Login and Profile. (See screenshot below.)
Create a Screen Name (this is how others will see you in the community), create a community Username and Password (this can be the same or different than your RW Username and Password), fill in your email (you'll have an opportunity at the bottom of the page to decide whether you want to make it available to other RW users), fill in your years of experience using the Research Wizard, and you can describe your trading experience in the box below. Finally, you can select to have your trading experience and email address made available to other members.
Once that's done, you'll be taken to the next page where you can select an avatar from the choices on that page (see below), or you can upload an image of your own (like a picture of yourself), to be displayed along with your Screen Name when you log in. (Take note, the image needs to be no larger than 200x200.) Once you've selected an avatar, click the Save button.
Once you've done that, a page will be displayed telling you that you've successfully completed your RWC registration, and that you can now login to the community. Click the 'here' hyperlink, which will take you to the community homepage where you'll automatically be logged in.
Now that you're logged in, you'll see in the Welcome!/login box that you're greeted by your Screen Name, and it shows you how many New unread threads and posts there are since you last logged in.
(Note: in the upper right hand corner is where you can Logout.)
If you click on the New threads link (there are 19 new unread threads in the example above), it'll take you to a page where all of the new unread threads can be accessed in one place.
Clicking on the New posts link (there are 60 new ones this example), it'll take you to a page where all of the new unread posts can be accessed in one place as well.
And if you click on the link that reads New posts from favorite (smiley face) authors (24 of them in this example), it'll take you to a page where all of the new unread posts from just your favorite authors can be accessed in one place. (See screenshot below.)
How the Front Page of the Community is Laid Out
The front page of the community has a simple layout. The Community tab at the top will be dark green when you're on the Community homepage.
There's also an RWC Search tab that will be visible when you're on the Community page. By clicking that one, you can search thru Threads, Posts, and Blogs by Keywords that appear in the title.
Underneath the tabs is a Welcome message to the left and the Welcome!/login box to the right.
Underneath there, and on the left, are tables which are organized by Sections such as Screening and Trading Strategies, or Backtesting, etc.
Under each section are three columns. The first is 'Category' with labels such as Momentum, Aggressive Growth, Value, etc. To the right of each category label, you'll see in parentheses how many threads are in this category and how many posts there are in total. Beneath the category label is a brief description of the category. And lastly, if you click the category hyperlink itself, it'll show you a list of all of the threads within that category.
To the right of that is the Latest thread column. There author who started the thread will be identified by his screen name. If the author is also identified as one of your favorite authors, it'll have a yellow smiley next to it. If you have not identified him as a favorite author of yours, but someone else has, it'll be identified with a white smiley so you'll know someone else has made them a favorite author of theirs. And if the author included an attachment in the original thread (image or downloadable screen or report), it will have a paperclip image next to it. By clicking on the thread link, you'll immediately be taken to the start of the thread.
To the right of that column is the Latest post column. Their you'll see the latest post, the date and time it was posted, the author's screen name, a yellow or white smiley if you or someone else has identified him as a favorite author, and a paperclip if an there's an attachment with this post. And by clicking the post link, it'll take you immediately to that particular post. (See below for a screenshot of the Sections, Categories, Threads and Post table.)
To the right of that table, and on the right (under the Welcome!/login box), there's a table which shows the Latest Post. Literally, the most recent post will always be displayed in that box. In it, you'll see the post's title, the author and his icon, along with how many years he's been an RW user, and the date and time it was posted along with his or her 'favorite' status.
Under there is a Most Popular Threads table. All of the usual information is contained within that table, including how many posts are in that thread.
And underneath there is a Most Popular Strategies table. Here' you can find the most popular user defined strategies ready for download. (See below.)
Using Threads and Posts
Once you click on a thread link, you'll be taken to the start of that thread. If you click on a post link, you'll be taken specifically to that post.
For example, after clicking on the Price and Volume thread, it opened up the start of that thread. In this example, it was created by KMatras, it shows the date and time it was created, his RW status, along with his favorites status. Additionally, if the author has a blog, there will be a blue conversation bubble icon as well. Also in that space, in the upper right corner, there will be a link where the user can add someone as a favorite or remove someone from their favorites list.
The thread text will be displayed in its entirety. And if there are any attachments, they will be listed underneath the thread. Acceptable attachments are images, screens (.und or .unc files), and reports (.rpd files).
By clicking on an attachment link, you can then download the attachment to your computer. If it's an RW strategy, it will then be ready to use with your Research Wizard program.
If you want to write a reply, just click the reply link and you'll be able to post a reply message. (More on this later.)
Note: when you are looking at someone else's post, there's just a reply link. When you are looking at your own post, you'll notice there is also an edit post link and a delete post link. This allows the user to edit, or delete a post he's made.

Beneath the thread, you'll see all of the reply posts and the replies to the replies that are germane to this post. (See below.) You can quickly scan the posts by screen name, or date, or by favorites, or by attachment, etc. As you move your mouse over each post, it will be highlighted in grey as the screenshot below shows. Note: as a default, just the subject line and the above mentioned information is displayed. (This is the 'no preview' or 'hide preview' mode.)
By clicking the 'Show Preview' link in the upper right, as many as three lines of each post will be displayed. This way you can read a little bit of the post before deciding if you want to click the post and read the whole thing. (To hide the preview text, just click the ‘Hide Preview' link in the upper right and it will go back to the default display, i.e., no preview text.)
Once you decide to read a post, just click the post's link. Then the post's preview will now be highlighted in green, and the full post will be displayed at the bottom of the page. (Note: the original thread post will still be viewable at the top as well. This way the start of the thread, all of the posts, and the post you're reading, will be accessible from this page. Likewise, even if you clicked on a post first, all of the posts and the thread that started the discussion will be accessible from the page you're on.)

Starting a Thread or Writing a Post
A user can start a new thread by clicking on a Category label link (like Momentum for example), from the main page. A page will open up, and in the right corner will be a link that reads, Add new Post.
Click that link, and the author's tuner will pop up. Give your thread a title. Write up your post. Attach any images. (As a default the 'Publish' box is checked in the bottom left. If you are not ready to publish it, you can uncheck the box and save it as an unpublished post. You can then review it later and publish it, i.e., make it live on the community, when you're ready.) If you want this to be added to your blog, just check that box and it will not only be made available on the site, but it will also be copied to your blog as well. Once you're done, click the Submit button and it's now posted on the site.
When replying to a thread or post; this time, just click the reply link in the bottom left ...

... and the author's tuner page will pop up.
As a default, the title will be displayed as a reply to the post. (Note: if you want to change the topic a bit, you can change the title. However, if you want your reply to stay attached to this discussion, keep the tile as it is.) Then write your post, attach any files or insert any images, decide if you want to add your post to your blog, and then click Submit when you're ready. Below is a just written post, and how it'll look before it's published. Let me also point out that I included an image in this post. The image will not show up in the body of the post in the tuner, but rather as an attached image. However, a thumbnail of the image will appear in the published post in the right margin of the body.
Below is what the published post looks like, with the image thumbnail in the body and all.
The user can then download the image by clicking on the image link at the bottom. Also, the user can see a full sized image in the post by simply clicking the image thumbnail. Then a full sized image will pop up. (See below.)
To close the image, just click 'Close' in the bottom right and you'll be back to the full post view.
RW Community Blogs
Another great feature of the RW Community is the blogs. While community members can designate certain authors as favorites, which will alert them every time a favorite author writes a post, the blog section is a convenient place for a user to read all of the comments an author has posted to his blog. This is great for your favorites, and it's also great if you want to read more comments made by an author you may or may not be familiar with to determine if you'd like to add that member to your favorites list.
If a member has a blog, you'll see a blue conversation bubble icon next to their avatar when you open a thread or a post. (See below.)

To access a member's blog, just click the icon and their blog page will appear. (See below.)
On that page will be a larger avatar of the user, along with his 'favorite' status, and Trading Experience. On the left will be all of the member's posts that were included in his blog, in descending order with the most recent post at the top. Each post has a three line preview. If you want to read the entire post, just click the post's subject line link (blue means it's unread, purple means you've read it) and the full post will open up. To get back to the blog page, just click your back button on your browser and it'll take you back to the main blog page.
On the right is the member's contact information (email address if they made it available to other community members). You can then directly email the member to converse with him or her outside of the community if you wish.
Underneath there is a Favorites section, which shows all of the favorites of that particular author.
Managing Your Profile Settings
Each user has the ability of managing their Profile settings. The way to access your Profile settings is to click on your avatar (or your blog icon).
Once you do, you'll be taken to the main blog page. But when viewing your own blog page, you'll notice that underneath the Favorites section on the right, there's one more section titled 'Manage Profile'. (See below.)

Click the Show Menu Settings link and an expanded Menu will be displayed. (See below.)
From there you can edit your profile, including updating your trading experience, changing your avatar, show or hide your contact information, and etc. You can also change your community password, and retrieve and review unpublished posts. And you can logout from this section as well.
Summary
The new Research Wizard Community is a great addition to the Research Wizard experience, as it connects Research Wizard users with other Research Wizard users from all around the world.
Search for help, exchange trading ideas and strategies, find out what other traders are thinking, and learn how to become a better trader.
Moreover, while the Research Wizard program is one of Zacks' most powerful tools, while at the same time being easy to use, not all of the features are as obvious to every user. By posting questions, or just seeing the unique ways other members use the program, you'll learn new ways that you yourself can use the program to take your trading to the next level.
And when you learn about all of things the program is capable of and the success stories of others, it can inspire you to make even better decisions in your trading. If you haven't registered for the RW Community yet, please take a moment to do so now, and plug into the Research Wizard network today.
|